 Switching to Platform.sh can help IT/DevOps organizations drive 219% ROI
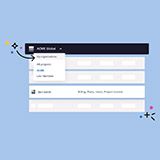 Organizations, the ultimate way to manage your users and projects
Django —a high-level framework—makes web development in Python easy. Platform.sh—a second-generation Platform-as-a-Service—makes the deployment easy. Together, they’re unbeatable combination.
When starting your project on Platform.sh, you can deploy an arbitrarily complex cluster with a single git push. Clone a production cluster into staging environment to try out a new feature, and when you’re satisfied with the result, just merge your changes into the production (master) environment.
Platform.sh supports a broad range of application languages and frameworks, and provides starter kits for many popular applications, including Django. That makes getting started with Django on Platform.sh as simple as a push of a button.
Which Django version should I choose?
Before you decide which Django version will best meet your needs, you need to determine which version of Python you’ll use. The choice is relatively simple. The Python 2 end of life is approaching. The only rationales to use Python 2 in 2018? Any specific third-party dependencies that don’t have a Python 3-compatible release.
The release of Django 2.0 dropped Python 2 support. Django 1.11 will receive security and data loss fixes until April 2020. This is pretty much aligned with Python 2 end of life.
In general, if you’re going to have a hard dependency on Python 2, start with Django 1 template; otherwise go for version 2 or version 3.
Project setup
Space is a mysterious place, where plenty of planets, asteroids, and moons are moving around different objects, creating huge systems. In this tutorial, we’re going to show you how to turn our Django 2 template into a simple service collecting data about the moons.
The first step is to clone the template repository locally by running:
$ git clone git@github.com:platformsh-templates/django2.git space-app
$ cd space-app
Now you should re-initialize git to have a clean history:
$ rm -rf .git && git init
$ git add -A && git commit -m "Initial commit"
You need to set up a virtual environment to be able to run Django administration and database migration tools locally. Managing virtual environments for your applications, and installing and tracking Python dependencies can be a bit of a challenge. Pipenv, the higher-level Python packaging tool, was designed to take this burden off your shoulders. Follow instructions in the documentation to install it on your system.
The default Python version used in the template is 3.7. In case you want to use a different version, set type in .platform.app.yaml file and python_version in your Pipfile to reflect the version you’ll be using. When you’re sure all the versions matches, run:
$ pipenv install
$ pipenv shell
The virtual environment will be created and activated, and you can add a new Django application to the project. This Python package will be dedicated to the moons orbiting their planets:
(space-app) $ django-admin startapp moonsThe new application has to be added into the list of installed applications, overwriting example hello application; it’s not needed at this moment. myapp/settings.py:
INSTALLED_APPS = [
    ...
    'django.contrib.staticfiles',
    'moons',
]
The next step? Deploy!
At this point, the template can’t really do anything useful, but it contains all the configuration to be deployed to Platform.sh.
First, install Platform.sh Command Line Interface following the CLI section of the official documentation. After CLI is installed and set up, you can create a new project through the Platform.sh user interface.
Sign in or create a new Platform.sh account. When you’re successfully logged in, click on the “ADD A PLATFORM” button on the top of the page, and choose the right Platform.sh plan and region to fulfill your needs. Creation of the new project will take a while. When it’s ready, and you get to the “Setting up your project” screen, select “Import your existing code,” which gives you the git commands to run from the template directory. Use the first command to add a git remote called “platform”, which points to your new Platform.sh project and run:
$ git push -u platform masterThe plain Django project is up and running in about a minute, and you can devote all your attention and energy to your code.
Database model
The basic setup is done, and you can start to build the pillars of your new service. The very first thing you need to define is a database model to store the data. The definition of Django models is pretty simple and straightforward.
moons/models.py:
from django.db import models


class Moon(models.Model):
    name = models.CharField(max_length=255, null=False)
    planet = models.CharField(max_length=255, null=False)
    discovered = models.DateField()
    volume = models.FloatField()
At this point, it’s the right time to create initial migration:
(space-app) $ python manage.py makemigrations moonsCommit the changes, including the generated migration file under ‘planets/migrations,’ and push the new code to your Platform.sh project:
$ git add -A
$ git commit -m "Add concept of database model"
$ git push platform master
You can see ongoing activity on your master environment. The application was rebuilt, and redeployment of the cluster has started. Your first impression might be that not much has changed since your first deployment, but let’s take more precise look at the master environment cluster.
When you open .platform.app.yaml file in the root directory of the project, you can see the following lines:
# The relationships of the application with services or other applications.
#
# The left-hand side is the name of the relationship as it will be exposed
# to the application in the PLATFORM_RELATIONSHIPS variable. The right-hand
# side is in the form `<service name>:<endpoint name>`.
relationships:
  database: "postgresqldb:postgresql"
This section creates a connection between the application and the PostgreSQL service. The PostgreSQL service is defined in the .platform/services.yaml file. See the configuration section in the documentation for a more detailed explanation.
Another interesting bit is at the very end of myapp/setting.py file:
relationships = os.getenv('PLATFORM_RELATIONSHIPS')
if relationships:
    relationships = json.loads(base64.b64decode(relationships).decode('utf-8'))
    db_settings = relationships['database'][0]
    DATABASES = {
        'default': {
            'ENGINE': 'django.db.backends.postgresql',
            'NAME': db_settings['path'],
            'USER': db_settings['username'],
            'PASSWORD': db_settings['password'],
            'HOST': db_settings['host'],
            'PORT': db_settings['port'],
        },
        ...
    }
The credentials of the PostgreSQL service running as part of the cluster are assigned to the default Django database. This means you can immediately start interacting with the database from your application.
To make the “just works” user experience complete, there’s a deploy hook running database migrations during each redeployment of the cluster in .platform.app.yaml file. This also happened after you added database model in the last commit and pushed it to the project.
Let’s ensure everything worked as intended. You can run psql directly on the remote database container using following command:
$ platform db:sqlYou should see a psql shell prompt, and you can run a bunch of SQL commands to verify that moon table was created, and it’s ready to be filled by the data:
psql (11.1 (Debian 11.1-1.pgdg80+1), server 9.6.1)
Type "help" for help.

main=> SELECT * FROM moons_moon;
 id | name | planet | discovered | volume
----+------+--------+------------+--------
(0 rows)
Now, let’s insert a testing data sample manually:
main=> INSERT INTO moons_moon VALUES('1', 'Phobos', 'Mars', '1877-08-17', '5729');RESTful API
With the growing popularity of microservices architecture, being able to make RESTful API for your application back end has become more important than ever. We’ll use Django REST Framework (DRF) to build an API on top of the database model. A nice thing about DRF is that it gives us a lot of functionality, like serializers and views, right out of the box.
First, create a dedicated branch for development of this feature:
$ git checkout -b restNow you need to install DRF and add it to the list of installed applications.
$ pipenv install djangorestframeworkAnd in myapp/settings.py:
INSTALLED_APPS = [
           ...
    'django.contrib.staticfiles',
    'rest_framework',
    'moons',
]
The REST framework is now available, and you can create a serializer for your Moon model. In moons/serializers.py:
from rest_framework import serializers

from .models import Moon


class MoonSerializer(serializers.HyperlinkedModelSerializer):
    def create(self, validated_data):
        return Moon.objects.create(**validated_data)

    def update(self, instance, validated_data):
        instance.name = validated_data.get('name', instance.name)
        instance.planet = validated_data.get('planet', instance.planet)
        instance.discovered = validated_data.get('discovered', instance.discovered)
        instance.volume = validated_data.get('volume', instance.volume)

    class Meta:
        model = Moon
        fields = ('name', 'planet', 'discovered', 'volume')
This class will automatically serialize and deserialize native Python data types of Moon model into JSON format.
Now you can create views with only a few lines of code using DRF.
moons/views.py:
from rest_framework import generics

from .models import Moon
from .serializers import MoonSerializer


class MoonList(generics.ListCreateAPIView):
    queryset = Moon.objects.all()
    serializer_class = MoonSerializer


class MoonDetail(generics.RetrieveUpdateDestroyAPIView):
    queryset = Moon.objects.all()
    serializer_class = MoonSerializer
The first view provides a list of stored moon resources; the second one provides a detailed view of a single moon.
You also need to create routes to expose the API endpoints.
moons/urls.py:
from django.urls import path
from django.conf.urls import url
from django.views.generic.base import RedirectView

from . import views

urlpatterns = [
    path('', RedirectView.as_view(pattern_name='moon-list', permanent=False), name='index'),
    url(r'^api/moons/$', views.MoonList.as_view(), name='moon-list'),
    url(r'^api/moons/(?P<pk>[0-9]+)$', views.MoonDetail.as_view(), name='moon-detail'),
]
Finally, remember to include moons.urls in the global myapp.urls patterns overwrite path, including hello.urls.
myapp/urls.py:
from django.contrib import admin
from django.urls import include, path

urlpatterns = [
    path("", include("moons.urls")),
    path('admin/', admin.site.urls),
]
Commit the latest changes, and push them to the dedicated branch of the project:
$ git add -A
$ git commit -m "Add REST API for moons"
$ git push platform rest
Now, activate the rest environment of your Platform.sh project by running:
$ platform environment:activateIn a few moments, the new rest environment cluster will be setup on Platform.sh, and you can start testing the API. Your service can now communicate with the outer world via HTTP requests. Copy the rest environment route serving the application from the CLI output and run:
$ curl -iL -H "Accept: application/json" \
   URL_OF_YOUR_REST_ENVIRONMENT/api/moons/1

HTTP/2 200
allow: GET, PUT, PATCH, DELETE, HEAD, OPTIONS
content-type: application/json

{"name":"Phobos","planet":"Mars","discovered":"1877-08-17","volume":5729.0}
Once you've verified that everything is working, open the rest environment overview in the user interface and hit the “Merge” button. Doing so will merge your latest changes into the master environment and redeploy it with your latest changes.
That’s it! You can easily create more branches, implement new features, and see them running in a production-like environments almost immediately. You can make sure that only well-tested code will be merged into your master branch. Remember: you can always roll back to the latest stable revision whenever you feel your latest release isn’t quite ready for production.